📊 USDJPY Weekly Outlook (ICT + Smart Money Concepts Analysis)
🔍 Institutional Order Flow, Liquidity Engineering & High-Probability Trade Setups
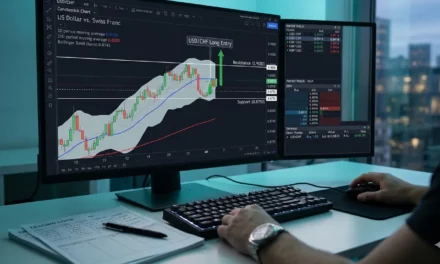
🧠 Market Overview
USDJPY is currently positioned at a critical inflection point, where higher timeframe bullish structure is still intact, but short-term price action is beginning to show early signs of distribution and liquidity manipulation. This is the kind of environment where the market appears directional on the surface, yet internally it is transitioning into a trap-filled phase designed to mislead traders before the next expansion move.
From a broader perspective, USDJPY has been in a strong bullish trend, driven primarily by interest rate differentials between the Federal Reserve and the Bank of Japan. However, recent price action near the 159.50–160.00 region shows a failure to continue higher cleanly, which is a key signal that smart money may be:
- Reducing long exposure
- Distributing positions
- Preparing for a liquidity-driven move
At the same time, price has reacted strongly from lower levels around 157.50, indicating that buyers are still present in the market.
👉 This creates a classic ICT scenario:
- Buyers defending discount zones
- Sellers positioning in premium zones
- Liquidity building on both sides
This environment typically precedes a sharp, decisive move once liquidity is fully engineered.
📅 High-Impact Economic Events (Next Week)
USDJPY is one of the most fundamentally reactive currency pairs, as it reflects the dynamic between:
- US monetary policy (Federal Reserve)
- Japanese monetary policy (Bank of Japan)
🇺🇸 United States
- Core PCE Inflation (High Impact)
- GDP Growth Data
- Initial Jobless Claims
- Federal Reserve Speeches
These events influence:
- Interest rate expectations
- USD strength
- Global risk sentiment
🇯🇵 Japan
- Bank of Japan Policy Updates
- Inflation Data
- Yield Curve Control (YCC) adjustments
JPY is particularly sensitive to:
- Changes in yield policy
- Government intervention
- Risk-off sentiment
🧠 Fundamental Insight
- Hawkish Fed + Stable BoJ → USDJPY bullish continuation
- Dovish Fed + Risk-off sentiment → USDJPY bearish reversal
However, from an ICT perspective:
👉 News is not the cause — it is the trigger
Smart money uses news events to:
- Sweep liquidity
- Induce retail traders
- Enter positions efficiently
📉 Daily Timeframe Analysis (Macro Narrative)
🔍 Structure Breakdown
The daily timeframe clearly shows a well-established bullish trend, characterized by:
- Higher highs
- Higher lows
- Strong impulsive legs
However, recent price action near the 160.00 level reveals a significant shift in behavior.
Key observations:
- Formation of a weak high (buy-side liquidity)
- Failure to break and hold above highs
- Sharp rejection from the 160 region
- Strong move down into 157.50
This sequence suggests that:
👉 The market is entering a distribution or rebalancing phase
📌 Key Daily Zones
- Buy-Side Liquidity (Weak High):
159.80 – 160.50 - Premium Supply Zone:
159.50 – 160.20 - Daily Demand Zone:
152.50 – 154.00 (major)
156.50 – 157.50 (refined) - Current Price: ~159.20
🧭 Daily Bias
👉 Bullish Structure, Bearish Short-Term Behavior
This creates a mixed bias environment, where:
- Long-term trend is still up
- Short-term flow is corrective
👉 Expect:
- Liquidity sweep above highs OR below lows
- Followed by expansion
📊 4H Timeframe Analysis (Execution Context)
🔍 Market Behavior
The 4H timeframe reveals a more detailed picture of current market dynamics.
Recent structure shows:
- A strong bullish leg into 159.80
- Followed by a CHoCH (bearish shift)
- A sharp sell-off into 157.50
- A strong bullish recovery
This creates a range-bound structure, where price is oscillating between:
- Supply near 159.50–160.00
- Demand near 157.50–158.00
📌 Key 4H Levels
- 4H Supply Zone:
159.50 – 160.00 - Liquidity Pool:
Above 160.00 - 4H Demand Zone:
157.50 – 158.00
🧠 Insight
The most important observation:
👉 The market is building equal highs and equal lows
This indicates:
- Liquidity above → breakout buyers
- Liquidity below → panic sellers
👉 This type of structure almost always leads to:
⚠️ A liquidity sweep before a directional move
⏱️ 1H Timeframe Analysis (Entry Precision)
🔍 Observations
The 1H chart clearly shows intraday manipulation patterns, including:
- Multiple CHoCH signals
- Sharp impulsive moves followed by slow retracements
- Rejections from supply zones
Price has recently rallied from the 157.50 demand zone, indicating that buyers are still active, but the move is now approaching a critical supply region.
📌 Intraday Zones
- 1H Supply Zone:
159.40 – 160.00 - Intraday Resistance:
159.30 - 1H Demand Zone:
157.50 – 158.00
🧠 Insight
This is a classic trap zone:
👉 Retail traders:
- Buy breakout above 159.50
- Sell breakdown below 158.00
👉 Smart money:
- Sweeps those levels
- Moves price in the opposite direction
🎯 High-Probability Trade Setups
🔴 Setup 1: Liquidity Sweep Sell (Primary Setup)
📌 Strategy: Buy-Side Liquidity Grab → Reversal
- Entry Zone:
159.80 – 160.50 - Stop Loss:
Above 160.80
🧠 Trade Logic
This is the most probable scenario:
- Price pushes into equal highs
- Breakout traders enter longs
- Smart money sells into liquidity
- Market reverses sharply
🎯 Targets
- TP1: 159.00
- TP2: 158.00
- TP3: 157.50
🟢 Setup 2: Demand Buy Continuation
📌 Strategy: Buy from Discount Zone
- Entry Zone:
157.50 – 158.00 - Stop Loss:
Below 157.00
🧠 Trade Logic
If price drops:
- Sell-side liquidity gets taken
- Institutions accumulate longs
- Price rallies again
🎯 Targets
- TP1: 159.00
- TP2: 160.00
🔴 Setup 3: Break & Retest Bearish Continuation
📌 Strategy: Momentum Confirmation
- Entry:
Below 158.50 after CHoCH
🧠 Trade Logic
If structure breaks:
- Confirms bearish continuation
- Enter on retest
🎯 Targets
- TP1: 157.50
- TP2: 156.50
⚠️ Risk Management Guidelines
- Risk per trade: 1–2% max
- Avoid:
- Trading mid-range
- Chasing breakouts
- Focus on:
- Liquidity sweeps
- Confirmation
📊 Weekly Trading Plan Summary
| Scenario | Action |
|---|---|
| Sweep above 160.00 | Sell |
| Drop into 157.50 | Buy |
| Break below 158.50 | Sell continuation |
| Strong USD | Bullish bias |
| Risk-off sentiment | Bearish bias |
🏁 Final Outlook
USDJPY is currently in a high-probability liquidity manipulation phase, where:
- Price is consolidating near highs
- Liquidity is building on both sides
- Smart money is preparing for expansion
✅ Professional Trading Approach
✔️ Wait for liquidity sweeps
✔️ Avoid breakout traps
✔️ Trade premium/discount zones
✔️ Focus on confirmation
🔥 Final Insight
The market is not random — it is engineered.
👉 The move this week will likely follow this sequence:
- Liquidity build-up
- Stop hunt
- Retail trap
- Explosive move
📌 Expected Weekly Flow
- Early week → consolidation
- Mid week → liquidity sweep
- Late week → expansion
Related Forex Analysis
Track intraday moves in the USDJPY daily outlook, compare with the GBPJPY weekly outlook, and monitor risk sentiment via the NAS100 weekly outlook. Also review COT reports.